


Part 1
By Boak Ferris
Following, please find a number of handball drills and tweaks designed and tested to accelerate your move to the next level. Whether you are a beginner, an intermediate, a pro, or simply seeking to improve your game, you should find a surprising drill or two that may just give you the boost or edge you seek. If you don’t like to drill, this text may not serve you.
NOVICES AND BEGINNERS
The most urgent skill you need when you begin, frankly, is a perfect first shot to master. As long as you are getting accustomed to the ball, the court, the walls, and the angles, you might as well use that time to build a solid “can-opener” first. A can-opener defines as “a shot that keeps the opponent unbalanced behind you.” Beginners love the kill shot, and would love to master that early, but hitting a perfect kill at the right time requires wisdom and sophistication. It takes a lot of energy to bend down and use your full mechanics, and, if you overhit it, it becomes a setup for savvy opponents, who can exploit your recovery time to win the rally. It’s also best used in tactical situations, when you are serving, since, if you miss, you only lose your serve, and not give the opponent a free point. Giving opponents free points is the fastest way to defeat.
At this stage, you would like to develop tactics while you develop mechanics, so this first drill works. (Mirror all drills below if you are lefty.)
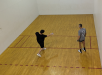
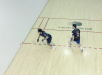
1) Master the close-proximity bounce-pass up your dominant-hand side wall first. Let’s name this shot the “Fred Lewis shot.” Stand about two feet behind the short line, and about four feet from the right sidewall. See if you can throw the ball, like a baseball pitcher, so that it caroms off the front wall and then bounces right in front of you, between your body and the right sidewall. Also throw it with enough strength that the ball continues along the sidewall past you, without ever hitting the sidewall and heads toward the backwall without coming off the backwall. Try to feel your arms, quads, hip-girdle-/beltline-rotation, and front-step down, prior to releasing the ball, as you perfect this throw. Feel your front-foot/rear-foot/front-foot sequence as you throw. (We’ll name this fundamental footwork sequence the 1-2-3.) Two types of this 1-2-3 sequence exist, one better than the other. The lesser is called the “straddle-step,” where the front foot steps out (1), the back foot steps up and sandwiches to the inside of the front foot (2), arch to arch, and then the front foot steps forward (3) again toward the wall target, to direct momentum and accuracy into the throw. [This sequence is lesser because the required early rotation of the right hip backward prior to stepping forward is “choked” by the feet being too close together.] The better choice is the “glide-behind step 2,” (which David Chapman called simply the “glide-step.”) The glide-step requires step 2 to plant behind step 1, with the right toe pointing at the left heel, and even plants slightly closer to the front wall than the front foot step 1, before finishing the step-down step 3. At the end of the 1-2-3, an imaginary line drawn from rear toe to front toe, is the line your throws and will naturally follow. To achieve a better glide-step, keep maintain your toes slightly pointed toward the near-side wall, and maybe even pointed a bit more, about fifteen degrees toward the back corner. Positioning your feet to point your toes kind of rearward forces you to do the 1-2-3 on the balls of your feet, instead of on the soles or heels. It also helps you finish your front foot step-down forward, toward the near-side wall. If it hurts your feet to pivot on the balls of your feet, you may need to learn to pivot on your heels, because to finalize future perfect hip-rotation through your throws and strikes, you will need to pivot your hips and torso over your feet from rear to front.

The secrets to consistency in this throw, and to next hitting the ball similarly, is to “load up” or strongly plant your back foot on step 1, and to simultaneously line up a backswing to guide your follow-through forward toward the front-wall target. [Note for peekers: if you are having trouble with consistency and accuracy, focusing on your backswing pre-line-up is the fastest way to troubleshoot and correct. Reference available on request. A second troubleshooting tip: finish your palm perfectly parallel to the front wall target as you throw/strike.] Once you can throw the Fred Lewis pass consistently, and can feel the correct body movements, now try to copy those while hitting the ball, bouncing the ball in front of your front foot, and then by stepping forward with your 1-2-3. Note that you may find more success using a sidearm throw/strike, maintaining your hitting forearm parallel to the floor as you finish, or by an underarm/pendulum type throw/strike. The pendulum starts with a sidearm backswing and lift, but ends by finishing with your fingers pointing toward the floor, and is a motion to eventually master, if you want career-longevity for your arms, back, and shoulders. You may find success, also, by bending your back leg during step 1, and then finishing step 3 by bending and absorbing your hip-turn into your front quads before “releasing the ball.” If you can hit the Fred Lewis shot 8 to 10 times out of ten, you are ready for drill 2. Notice in handball you have an advantage over pitchers, who have to pitch from a standing position, whereas you are allowed to run forward, accelerating your body weight forward into the equation for the “pitch.” If you find your throws and strikes ending up too much toward center court, instead of between your body and the near sidewall, you can correct by placing step 3 down more toward the sidewall, until the ball trajectory is perfect.
[Insert for coaches: coaches may find success coaching clients to experiment with the pitching throw/hit 1-2-3, as advised herein, to help beginners feel the torque caused by sweeping the front arms out prior to cycling their shoulders and completing the 1-2-3 during a throw or strike. Another option is to have novices learn to throw/hit as if swinging a baseball bat. This latter visualization helps beginners maintain a load on their rear foot, but is negative in the sense that the front arm does not sweep out ahead to generate the power and torque generated by the opened shoulders working in “opposition.”]
2) You now want to learn to hit the Fred Lewis shot, aiming to hit the ball to rebound on that same spot on the floor, from farther back in the court, with your strong hand. As you master the first drill, next move the starting point of the drill back in five-foot increments, straight back along the right sidewall, and make the ball rebound off the front wall to the floor target exactly as in drill 1. (Instead of starting two feet behind the short line, you now move to 7 feet, 12 feet, and so on, with your dominant-hand sidewall four to six feet in front of you.) As you move back, you may find you need to lift the ball toward the front wall since you are farther back, in order to bounce the ball right on the floor next to the wall. Once you can hit the Fred Lewis shot from the 30-foot mark, you now want to master this shot by hitting it from anywhere in the court with your dominant hand. I suggest moving back from the floor-position in drill 1 in a semicircle in five-foot increments back to the rear non-dominant-hand corner, to hit this same shot with just your strong hand, even if you park your butt on the non-dominant-hand side wall. See if you can rebound the ball on this same exact floor-spot from the non-dominant-hand service-line area, too, using your dominant hand.
3) Once you have got the idea and feel of this shot mastered, you must teach it to your offhand to move up the ranks. For righties, you will now hit with your left, to Fred Lewis-bounce-pass the ball up the left wall, between your body and the wall; while lefties hit the Fred Lewis pass up the right wall with their rights. We will call this version of the Fred Lewis shot, as a tactic, the “up-the line shot” or “same-side to same-side”. Do just as you did with drills 1 and 2. And for the piece-de-resistance, you now want to master hitting these Fred Lewis shots, not by dropping the ball and striking, but by tossing it up to the front and sidewalls, letting it bounce in front of you, getting your backswing lined up, and then “hitting the Fred Lewis up-the-line bounce-pass shot.”
Here’s how to troubleshoot the off hand: Most novices and beginners, and even intermediate players, struggle with perfecting the off-hand, because they omit two biomechanics necessary for making it expert: a) You must lift your front arm up, and sweep it out, first, before striking the ball with your off hand. If the front arm drags or hangs, the struck ball falls toward the ground as the dragging front shoulder pulls the ball downward. Maintaining a lifted front arm and elbow keeps the dual-shoulders rotation parallel to the floor, and produces a shot that flies as you intend. b) Second, you must finish and “close” your front step 3, toward the wall, after using the mandatory 1-2-3, even while directing your off-hand shots, to develop accuracy. So, if you find the ball weak or dropping, the front shoulder is not clearing the way; and if you find the shot pulling toward center or scattering, you need to finish that front foot step 3 down.
*Why are you learning this shot first? Well, each shot you hit will involve a tactical situation. In many cases, your opponent has returned to center court, and stands possibly behind you or out of sight. This shot is designed to move the visualized-but-unseen opponent behind you up YOUR strong-side wall, where you can watch the opponent as you yourself glide-step back to center-court position between the restraining and service lines. So, if you get this drill down, you will be mastering the court, too, so learn to add a required glide-step after each shot to own center court, each time you practice drills 1-3 above.
*Important note and disclaimer: do not try anything herein without first seeking the necessary advice of your physicians and coaches who may need to certify you to try any included biomechanics or lifestyle choices.
*Coach Boak’s “HANDBALL DRILLS AND TWEAKS for NOVICES AND BEGINNERS” will be followed by Handball Drills and Tweaks for Intermediates and Advanced players.

Boak Ferris
WPH Coach